How to Remove a Wasp Nest Safely

Jose Brito
I’m Jose Britto, the writer behind The Country Store Farm Website. I share practical, down-to-earth gardening advice for home growers—whether you’re starting your first raised bed, troubleshooting pests, improving soil, or figuring out what to plant next. My focus is simple: clear tips you can actually use, realistic expectations, and methods that work in real backyards (not just in perfect conditions). If you like straightforward guidance and learning as you go, you’re in the right place.
Wasp nests can go from “we barely notice them” to “we cannot use the patio” quickly. The safest approach is not always the most aggressive one. In many temperate climates, a small, out-of-the-way nest can often be left alone until the first hard frosts, when activity drops and the colony dies off. Other times, especially when a nest is in a wall void or near a doorway, you need to act quickly and carefully.
This guide walks you through how to identify what you are dealing with, when DIY removal is reasonable, and how to remove a wasp nest as safely as possible. If at any point the situation feels risky, trust that instinct and call a licensed pest professional.

First, identify the nest type
Different wasps nest in different places and respond differently when threatened. A quick, calm identification helps you choose the right removal method and avoid surprises.
Before you start: is it bees?
Honey bees and many native bees are important pollinators and are often protected or best handled with relocation rather than extermination. If you see fuzzy, brownish bees and a steady stream entering a cavity, consider contacting a local beekeeper or bee removal specialist for help with safe removal.
Paper wasps
- What the nest looks like: An open, umbrella-shaped nest with visible hexagonal cells. Often gray or tan.
- Where you find it: Under eaves, porch ceilings, deck rails, light fixtures, fence posts, outdoor furniture.
- Typical behavior: Defensive near the nest, but often less aggressive than yellow jackets if you move slowly and work at dusk.
Yellow jackets
- What the nest looks like: Usually hidden. The visible clue is steady traffic in and out of a small opening.
- Where you find it: In the ground (old rodent burrows), under rocks, inside landscape timbers, wall voids, attics.
- Typical behavior: Fast to defend and can sting repeatedly. Ground nests are a common cause of multiple stings.
Hornets (often bald-faced hornets)
- What the nest looks like: A large, enclosed, papery “football” or teardrop nest.
- Where you find it: Trees, shrubs, under eaves, sometimes sheds or barns.
- Typical behavior: Can be very defensive. Large nests should usually be handled by a professional.
Note: Bald-faced hornets are actually a type of yellow jacket, but the common name is widely used and the safety approach is the same: give them space and be cautious.
Tip: Do not stand in the flight path while you are identifying. Watch from a distance for a minute or two and note where they enter and exit.
Should you remove it yourself?
DIY removal can be reasonable for a small, exposed paper wasp nest that you can reach safely. It is a bad idea for nests that are hidden, large, hard to access, or located where you cannot control your footing and escape route.
DIY is usually okay when:
- The nest is small to medium and fully visible.
- You can reach it from the ground without a ladder.
- It is early in the season with lighter activity.
- No one in the household has a known allergy to stings.
- You can close off the area from kids and pets.
Call a professional when:
- You see heavy activity, a large nest, or constant traffic in and out of a hidden opening.
- The nest is in a wall, attic, soffit, chimney, or other structural void.
- You would need a ladder, roof access, or you are working over steps or uneven ground.
- It is a ground nest near where people mow, garden, or walk.
- You have been stung before and had a strong reaction, or anyone nearby has a sting allergy.
- You cannot confidently identify the nest type.
- You see multiple entry points, wasps inside the home, or repeated stings in a high-traffic area.
Realistic expectation: If the nest is inside a wall void, spraying the entrance can kill many wasps but still leave the nest behind. Depending on nest size and location, that can lead to odor, staining, or secondary pest activity later. This is one reason professionals often use dusts and controlled application methods for structural nests.
Pick the safest timing
If you remove a nest yourself, timing matters as much as the product you use.
- Best time: Dusk or very early morning (pre-dawn) when most wasps are inside and less active.
- Avoid: Midday removal. Activity is high, and your chance of getting swarmed goes up.
- Weather: Calm conditions are best. Wind can blow spray back at you and make wasps more erratic.
Plan your exit route before you start. You want a clear, unobstructed path back indoors.
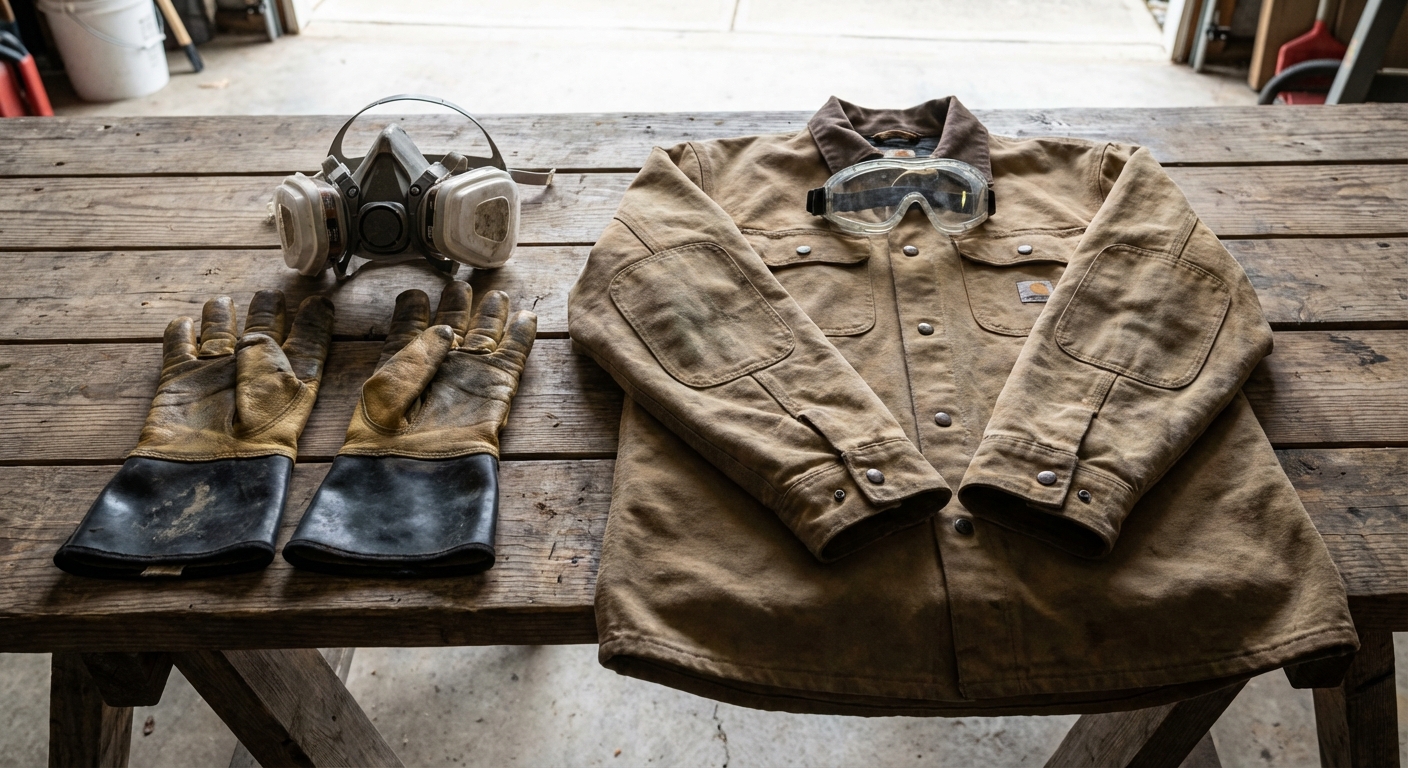
Protective gear and prep checklist
You do not need to look like a beekeeper for every situation, but you do need to protect the areas that get hit most often: face, hands, neck, and ankles.
What to wear
- Long sleeves and long pants made of thicker fabric
- Closed-toe shoes plus socks (tuck pants into socks if you can)
- Thick gloves (leather or heavy work gloves)
- Eye protection (wraparound safety glasses or goggles)
- A hat helps keep wasps out of your hair and off your face
What to do before you spray
- Bring a flashlight if it is dusk. Pro tip: use a red light, or cover a standard flashlight with red cellophane, so you can see without drawing wasps toward the beam.
- Keep kids and pets indoors.
- Close nearby doors and windows.
- Remove outdoor food, sugary drinks, and trash that attract yellow jackets.
- Have your supplies ready so you are not fumbling around near the nest.
- Follow the label. Keep sprays away from open flames and use extra caution around electrical fixtures.
Safety note: If you have a history of severe reactions to stings, do not DIY nest removal. Even one sting can be an emergency.
Step-by-step: remove an exposed paper wasp nest
This is the most common DIY scenario: an open nest under an eave, porch ceiling, or deck rail. The goal is to kill the wasps quickly, then remove the nest once activity stops.
1) Choose the right product
Use a wasp and hornet aerosol labeled for nest treatment with a long-range stream. Read the label fully and follow it. Different products have different distances and re-entry guidance.
2) Approach slowly at dusk
Move calmly, do not bump the structure, and stay out of the main flight path if possible.
3) Spray the nest thoroughly
- Stand at the recommended distance on the label.
- Start spraying slightly above and around the nest, then directly at the nest and open cells from that labeled distance.
- Use a steady stream rather than quick bursts if the label allows.
4) Leave the area
Go indoors immediately. Even at dusk, a few wasps can be out and will investigate.
5) Check activity the next day
If you still see active wasps on the nest, repeat treatment at dusk again. Do not knock down an active nest.
6) Remove and dispose of the nest
Once you see no activity, scrape the nest into a plastic bag, seal it, and place it in an outdoor trash bin. Clean the area to remove residue and make it easier to spot any new construction later.
Step-by-step: treat a ground yellow jacket nest
Ground nests are the ones that catch people off guard while mowing or weeding. They are also one of the riskiest DIY jobs. If the nest is near a high-traffic area, consider calling a professional.
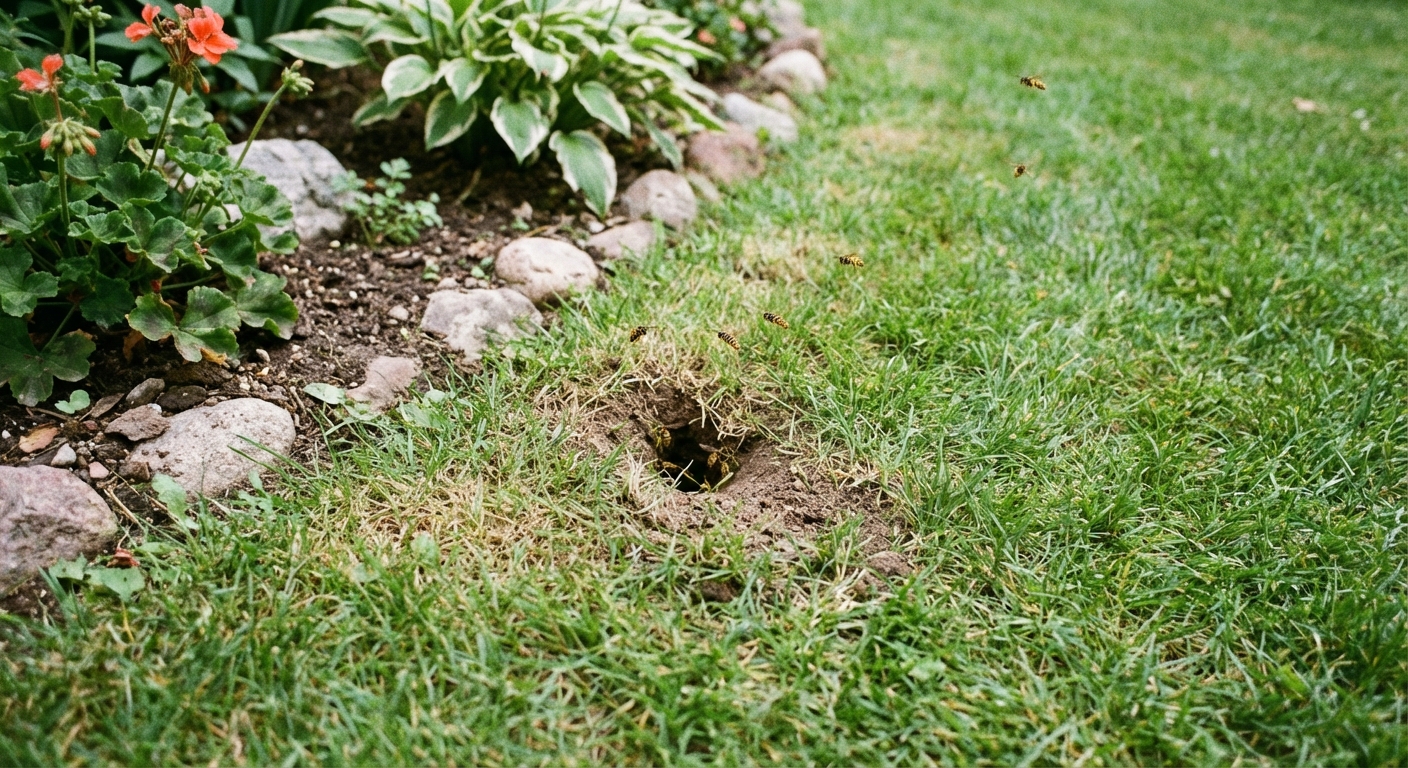
1) Find the entrance from a safe distance
Watch where the wasps go in and out. Mark the area from several feet away so you can find it at dusk without hovering over it.
2) Treat at dusk when activity drops
Use a product labeled for ground-nesting yellow jackets. Many homeowners have better results with insecticide dust applied into the entrance because it gets carried deeper into the nest. Follow the label exactly.
Pro tip: use a bulb duster
A bulb duster helps puff dust into the tunnel so it coats the inside rather than clumping at the surface. Apply only as directed on the label, then back away.
3) Apply quickly and leave
Have everything ready. Apply, then walk away calmly. Do not stand over the entrance and do not shine bright light directly into it.
4) Do not flood the hole
Pouring water, gasoline, or other liquids into a ground nest is dangerous and can cause wasps to erupt or relocate. Gasoline is also a serious fire and contamination hazard.
5) Recheck the next day
Some nests need a second dusk treatment. If activity is still heavy after two treatments, stop and call a professional.
Step-by-step: nests in walls, soffits, or attics
These are the situations that most often turn into a bigger problem. You usually only see a steady stream of wasps entering a crack, vent, or gap.
What not to do
- Do not seal the entrance first. Trapped wasps may chew through drywall or end up inside your living space.
- Do not spray blindly into vents. It may not reach the nest and can increase the risk of pesticide exposure indoors or wasps emerging elsewhere.
- Do not cut into walls unless you are prepared for an aggressive response and potential repairs.
What to do instead
- If you can, limit access to the area and keep people away.
- Call a licensed pest control professional. They have the right products and tools to treat void nests and reduce the chance of wasps moving indoors.
- After the nest is confirmed inactive, then discuss sealing and repairs so the site does not get reused next season.
After removal: keep them from coming back
Once the immediate danger is gone, a little prevention goes a long way. Wasps are persistent, and new colonies may choose the same sheltered spots year after year even though old nests are typically not reused.
Quick prevention checklist
- Clean the nest area to remove residue and reduce attractants. It also makes it easier to spot fresh nest building early.
- Seal gaps and cracks around soffits, siding, and utility penetrations once you are sure there is no active nest.
- Repair or replace damaged screens on vents and windows.
- Keep trash bins closed and clean up fallen fruit.
- In early spring, do a quick weekly scan under eaves and deck rails. Small nests are easier to handle.
When it is an emergency
Call emergency services right away if someone shows signs of an allergic reaction after a sting, including trouble breathing, swelling of the face or throat, widespread hives, dizziness, or vomiting. If you have an epinephrine auto-injector available, use it as directed and seek immediate medical care.
Common questions
Will wasps leave a nest at night?
Most are inside the nest at night, which is why dusk and early morning are the safest times to treat. A few can still be active, especially if disturbed.
Should I knock down a nest after spraying?
Wait until you see no activity, usually the next day. Knocking down a nest too soon is one of the easiest ways to turn a manageable job into a swarm.
What if the nest is high up?
If you need a ladder, it is often safer to hire a professional. Falls plus stings are a bad combination, and low light makes ladder work even riskier.