How to Grow Peppers From Seed at Home

Jose Brito
I’m Jose Britto, the writer behind The Country Store Farm Website. I share practical, down-to-earth gardening advice for home growers—whether you’re starting your first raised bed, troubleshooting pests, improving soil, or figuring out what to plant next. My focus is simple: clear tips you can actually use, realistic expectations, and methods that work in real backyards (not just in perfect conditions). If you like straightforward guidance and learning as you go, you’re in the right place.
Peppers are one of those plants that reward patience. They are not hard, but they are slow compared to tomatoes and beans, and they really care about warmth. If you start them right indoors, you can grow bells, jalapeños, and cayennes at home without fancy gear, just a few basics and good timing.
What you need to start pepper seeds
You can do this with a simple setup. The goal is consistent moisture, steady warmth for germination, and strong light once they pop up.
- Pepper seeds (fresh seeds germinate faster)
- Seed starting mix (light, fluffy, drains well)
- Cell trays or small pots with drainage
- Humidity dome or plastic wrap (optional, but helpful)
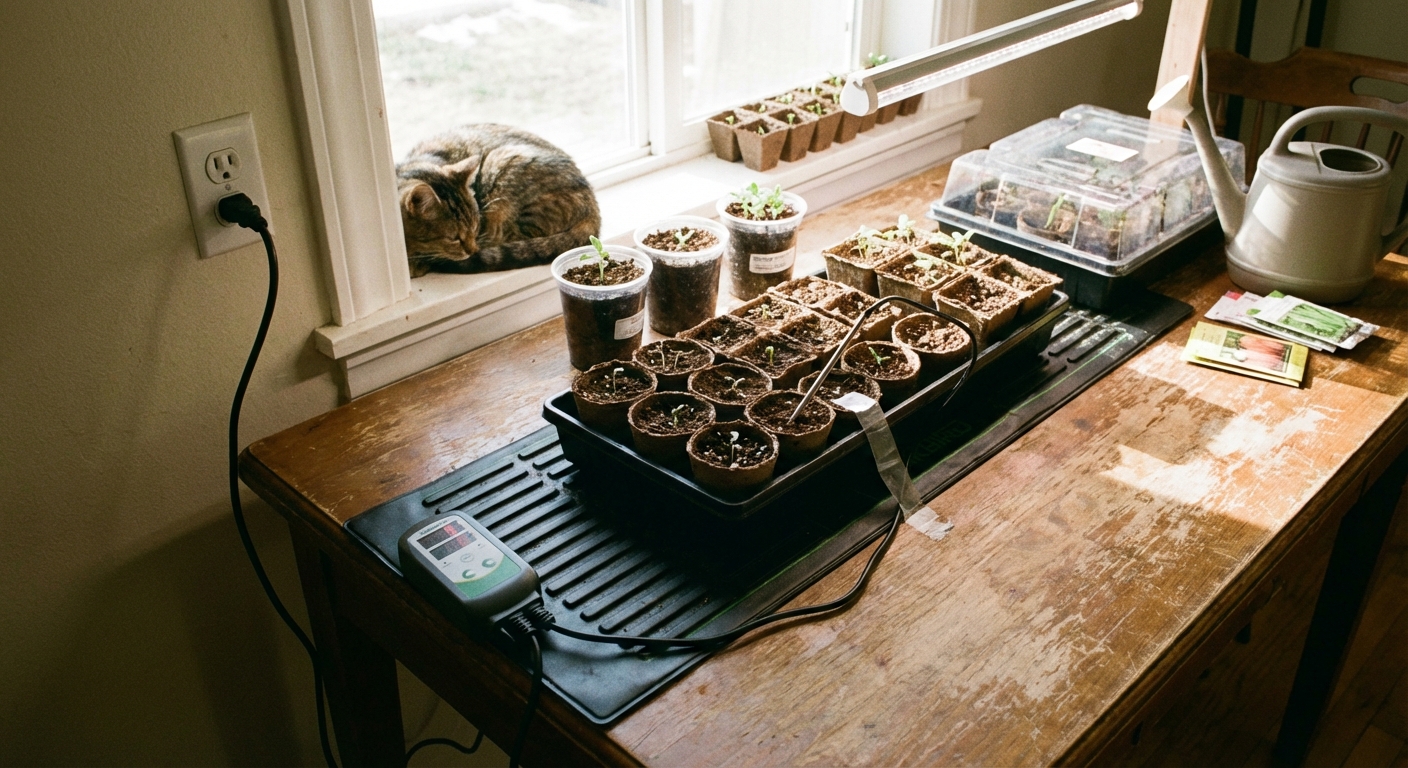
- Heat mat (strongly recommended for peppers)
- Grow light or a very bright window (grow light is more reliable)
- Spray bottle or gentle watering can
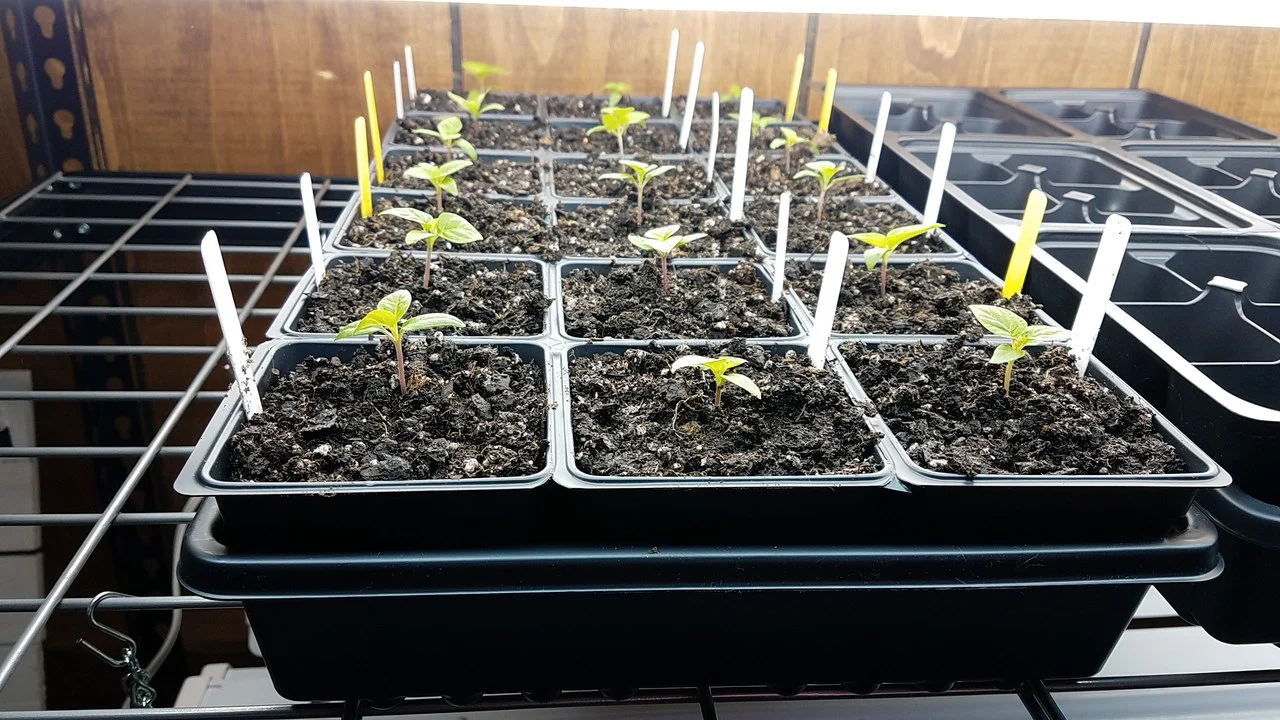
- Plant labels (pepper seedlings look alike early on)
When to start pepper seeds indoors
Most home gardeners do best starting peppers 8 to 10 weeks before your last expected frost date. If you start too early without enough light and space, you often end up with tall, stressed seedlings that stall after transplanting.
If you are not sure, aim for 9 weeks. That usually gives you seedlings that are big enough to handle the move outside, but not so big they get root-bound.
If you have a very short summer, you may need 10 to 12 weeks indoors, or you may want to choose earlier varieties (especially for bells).
How to plant pepper seeds (step by step)
1) Fill and moisten your mix
Put seed starting mix in a bucket, add water, and mix until it feels like a wrung-out sponge. Pre-moistening helps you avoid dry pockets that can stall germination.
2) Sow at the right depth
Plant pepper seeds about 1/4 inch deep. Cover lightly and press the mix down gently so the seed has good contact with the soil.
If you plant more than one seed per cell, that is fine. Just plan to thin later.
3) Keep them warm and evenly moist
Water gently, then cover with a dome or plastic wrap if your indoor air is dry. You are aiming for consistently damp soil, not soggy soil.
When to remove the dome: as soon as most seedlings are up, crack the dome for a day, then remove it. Leaving it on too long keeps things too wet and invites damping-off.
4) Thin if needed
If two seedlings sprout in one cell, keep the strongest one and snip the extra at soil level. Pulling can disturb the roots of the seedling you want to keep.
Do you really need a heat mat?
For peppers, most of the time, yes. Peppers germinate best in warm soil, and room temperature air is not the same as warm soil in a tray.
- Best soil temperature for germination: around 80 to 85°F (up to about 90°F)
- Usable range: 70 to 85°F (expect slower, less even sprouting at the low end)
- Typical germination time: 7 to 21 days depending on temperature and variety
If your peppers are taking forever to sprout, the number one fix is most often more warmth. A heat mat with a thermostat is ideal, but even a basic mat helps a lot.
Light after sprouting
As soon as seedlings emerge, shift from “warm and humid” to “bright and breezy.” If seedlings do not get enough light, they stretch and get thin, and peppers do not bounce back from that as well as tomatoes sometimes can.
- Light distance (depends on fixture):
- Shop lights and basic LED bars: about 2 to 4 inches above seedlings
- Stronger LED panels: often 12 to 18 inches above seedlings
- Quick cues: stretching means the light is too far or too weak, bleaching or crisp leaf edges can mean it is too close or too intense
- Light duration: 14 to 16 hours per day
- Airflow: a small fan on low helps reduce damping-off and builds stronger stems
If you are using a sunny window, pick the brightest one you have and rotate trays daily. Still, expect slower, leggier growth unless the light is truly intense.
Watering seedlings indoors
Moist, not soaked is the goal. The easiest way to do that is to water from the bottom once seedlings are up.
- Bottom-water: set trays in a shallow pan of water for 10 to 20 minutes, then drain
- Top-water: fine too, just be gentle and avoid keeping the surface constantly soggy
- Let the surface dry slightly between waterings, but do not let the cells go bone-dry
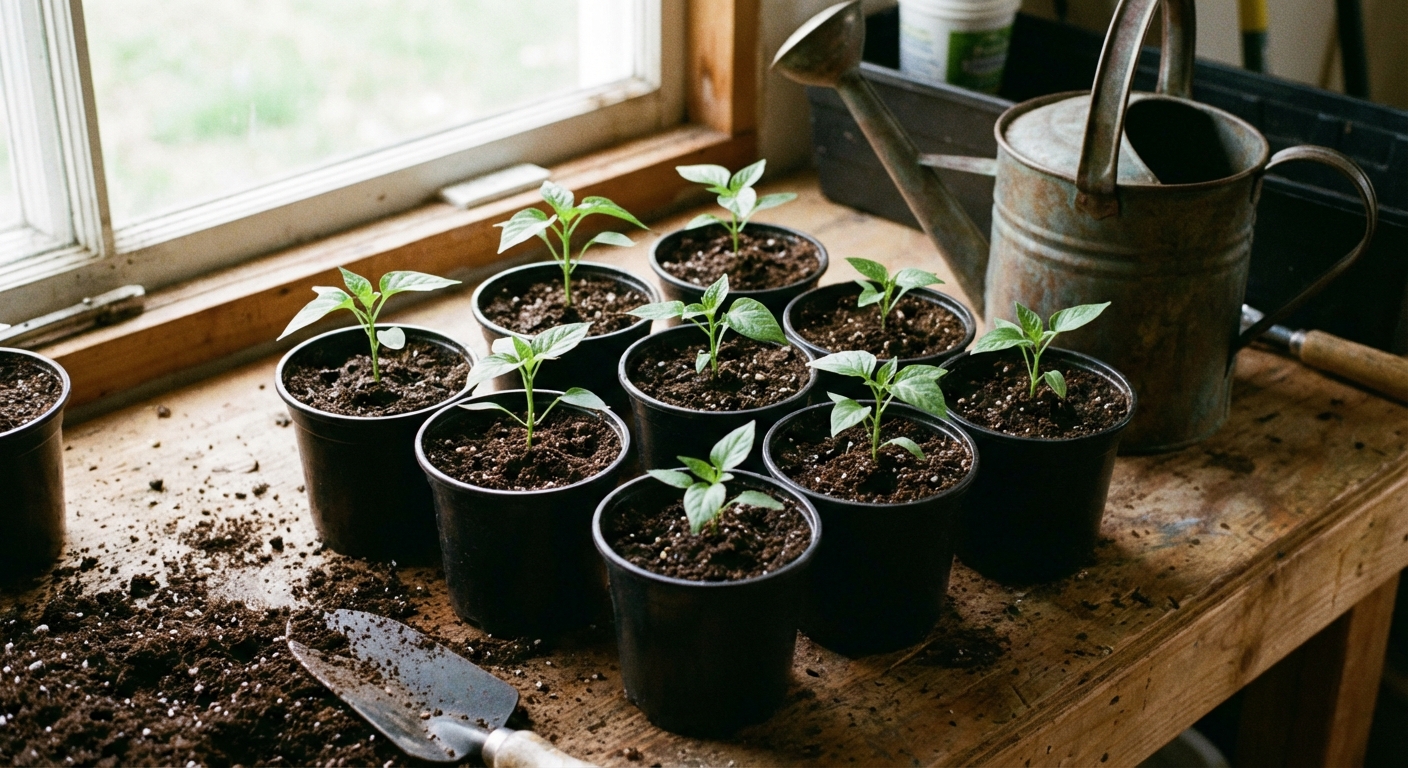
Potting up
Peppers often need more time indoors than their first little cells allow. When roots fill the cell and the seedling has 2 to 3 sets of true leaves, move it to a larger container.
- First pot-up: from cell tray to 3 or 4 inch pot
- Soil: a quality potting mix, not heavy garden soil
- Depth: plant at the same depth as before. Peppers can form adventitious roots, but not as readily as tomatoes, and burying stems deep in cool, wet mix can invite rot
This one step prevents the “stuck seedling” problem where plants look healthy but barely grow for weeks.
Hardening off and transplanting
Peppers hate cold soil. A lot of transplant problems come from planting them out when the calendar says “spring” but the ground still feels like winter.
When to move peppers outside
- After last frost and when nights are consistently above 50 to 55°F
- Best growth starts when soil is closer to 65°F+
- Many gardens do better waiting 1 to 3 weeks after last frost for peppers
Hardening off
About 7 to 10 days before transplanting, start giving seedlings outdoor time. Begin with an hour in shade, then gradually increase time and sun exposure. Wind and direct sun can scorch indoor-grown leaves fast, even if the plant is healthy.
Spacing and containers
- In-ground spacing: about 18 to 24 inches apart (a bit tighter for small hot peppers, wider for big bells)
- Container size: at least 3 to 5 gallons per plant, larger is easier to keep evenly watered
Optional tip: first flowers
In short seasons or on small plants, pinching the very first flowers can help the plant size up before fruiting. If your season is long and plants look vigorous, you can usually let them set fruit naturally.
Sun and soil needs
Sun
Peppers want full sun. In real backyards, aim for at least 6 hours of direct sun, with 8+ being even better for heavy fruiting.
Soil
- Drainage: good drainage is non-negotiable
- Soil pH: roughly 6.0 to 7.0
- Fertility: moderately rich soil with compost is ideal
If you are growing in raised beds, peppers do great in a loose mix with compost. In containers, use a quality potting mix and plan to fertilize regularly.
Beginner varieties
If you are new to peppers, start with varieties that germinate reliably and produce well in typical home garden conditions.
Bell peppers
- Great for cooking and fresh eating
- Take longer to mature than hot peppers, so start on time
- Look for short-season types if you have a cooler or shorter summer
Jalapeño
- Usually productive and forgiving
- Good “first hot pepper” because it sets fruit reliably
Cayenne
- Often one of the easiest hot peppers to grow
- Produces lots of thinner peppers, great for drying

Watering and feeding
Peppers prefer consistency. Big swings between bone-dry and soaking-wet can lead to stress, blossom drop, and smaller harvests.
Watering basics
- Water deeply, then let the top inch of soil dry slightly
- Mulch helps keep moisture even once the soil has warmed
- Containers dry out fast, sometimes daily in summer
Fertilizer tips
Too much nitrogen gives you a beautiful leafy plant that drags its feet on flowering. Use compost at planting, then switch to a balanced or slightly lower-nitrogen fertilizer once plants start budding.
- Early stage: light feeding is fine
- Bud and fruit stage: focus on steady nutrition, avoid heavy nitrogen
Troubleshooting
Seeds not germinating
- Most common cause: soil too cool
- Also check: old seed, mix drying out, planting too deep
Fix: Use a heat mat, keep mix evenly moist, and be patient. At cooler temps, peppers can take 3 weeks.
Leggy seedlings
- Cause: not enough light or light too far away
- Fix: move grow light closer or dim intensity, increase light hours, add gentle airflow
Slow growth after potting up or transplanting
- Cause: cold nights, cold soil, or root-bound seedlings
- Fix: wait for warmer weather, pot up earlier, consider black plastic or mulch after soil warms to hold heat
Peppers often “sit” until they get steady warmth, then they suddenly take off.
Flowers dropping
Some blossom drop is normal, especially early. But heavy drop usually means stress.
- Heat stress: above about 90 to 95°F can reduce fruit set (variety and humidity matter)
- Cold stress: nights below about 55°F can cause drop
- Water stress: irregular watering triggers it
- Too much nitrogen: lots of leaves, few peppers
Fix: stabilize watering, avoid overfeeding nitrogen, and give a little afternoon shade during extreme heat if needed.
Blossom end rot
This shows up as a dark, sunken spot on the bottom of the fruit. It is tied to calcium uptake, but the real issue is usually inconsistent watering.
- Fix: water consistently, mulch, avoid root damage, and do not overdo fertilizer salts in containers
Indoor pests
Under lights, peppers can attract aphids and spider mites.
- Check the undersides of leaves weekly
- Rinse plants with water and use insecticidal soap if needed
- Good airflow helps
Simple timeline
- Week 0: Sow seeds indoors at 1/4 inch deep on a heat mat
- Week 1 to 3: Germination, then move under strong lights and remove dome
- Week 3 to 6: Grow on, keep lights at the right distance, water evenly
- Week 4 to 7: Pot up to 3 or 4 inch pots once they have true leaves and roots fill the cell
- Week 8 to 10: Harden off and transplant after nights stay above 50 to 55°F
If you follow that rhythm and prioritize warmth and light, peppers become one of the most reliable plants in the garden.